The as yet to be named newest Steampunk in the family was very misbehaved! They simply would not do what I wanted them to do. So Ron stepped in and in his best dad voice read them the riot act. Success! Here are some closeups showing their northern light, iceberg collar, equator belt buckle and ocean of fish. In addition, They are a rattler, another Steampunk rolls and the shake is on the worktable.
It was city wide garage sales in Mountain Home starting today. It was rainy so we weren’t sure how many would be open. The Lutheran church has 2 sales a year and that’s inside so we knew they would be open and running. I love a sale that figures everything is someone else’s treasure. Since I am on the look out for assemblage art materials I was in luck. The pictures below are what I bought. I’m in love with the oriental paper fans. I broke the bank and spent a total of $2.75.
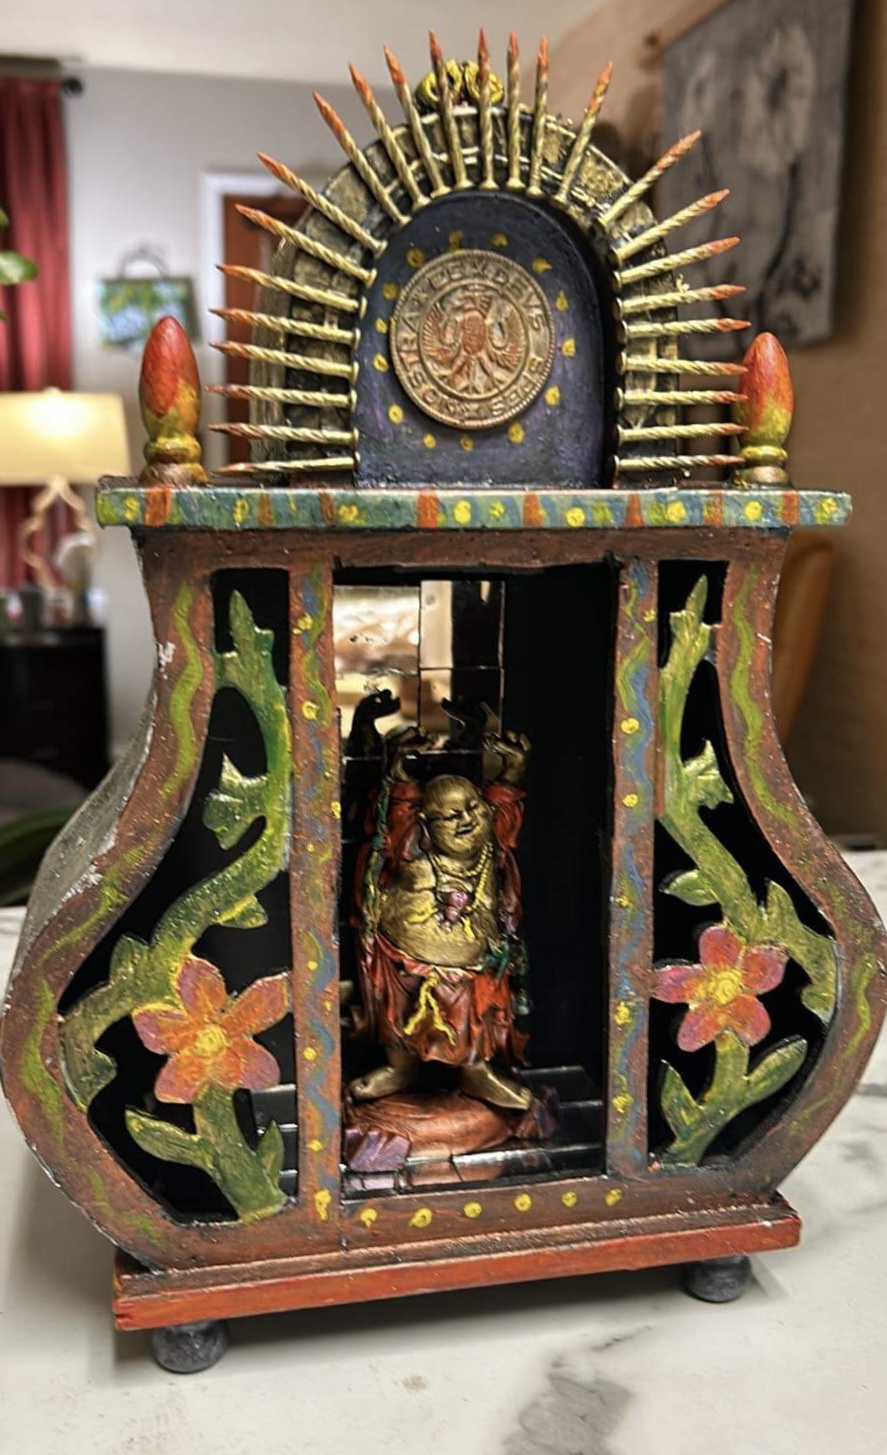
from the Goodwill store. It was too good to pass up. I saw possibilities. And so it began. It had a closed in front with a tiny gate that opened. I couldn’t get my hand inside so the first thing I did was cut the front out to open it up. Then I could see the beginnings of a shrine.
Tiny mirror tiles on the inside floor and back wall. Painting the little Buddha for the inside. Glueing brass nails and a medallion on the top. It was coming together. I needed to paint the case to bring out the little carvings of flowers and vines.
I was waiting for an order of silver leaf and gold leaf to arrive. I was so happy when it arrived. I’ve never used it before so of course I watched a lot of online videos about it. It all looked so easy! Well let me tell you it is not easy to work with! I was still pleased with the finished look of aged, crinkled precious metals. The final finish was to use black furniture wax on the entire piece. It looks like I envisioned so it was worth it.
As promised here is a pictorial on how to make a DIY hanging system for your studio wall. See the previous post for the parts that I purchased on Amazon. My cost was exactly $40 plus tax. Since I am a Prime member there was no shipping. The only other cost I had was for the molding at the top of the wall for the picture rail. An 8 ft piece at the box lumber store was $10. I am going to extend this a few more feet so whatever length you want for your wall will determine your cost for the molding.
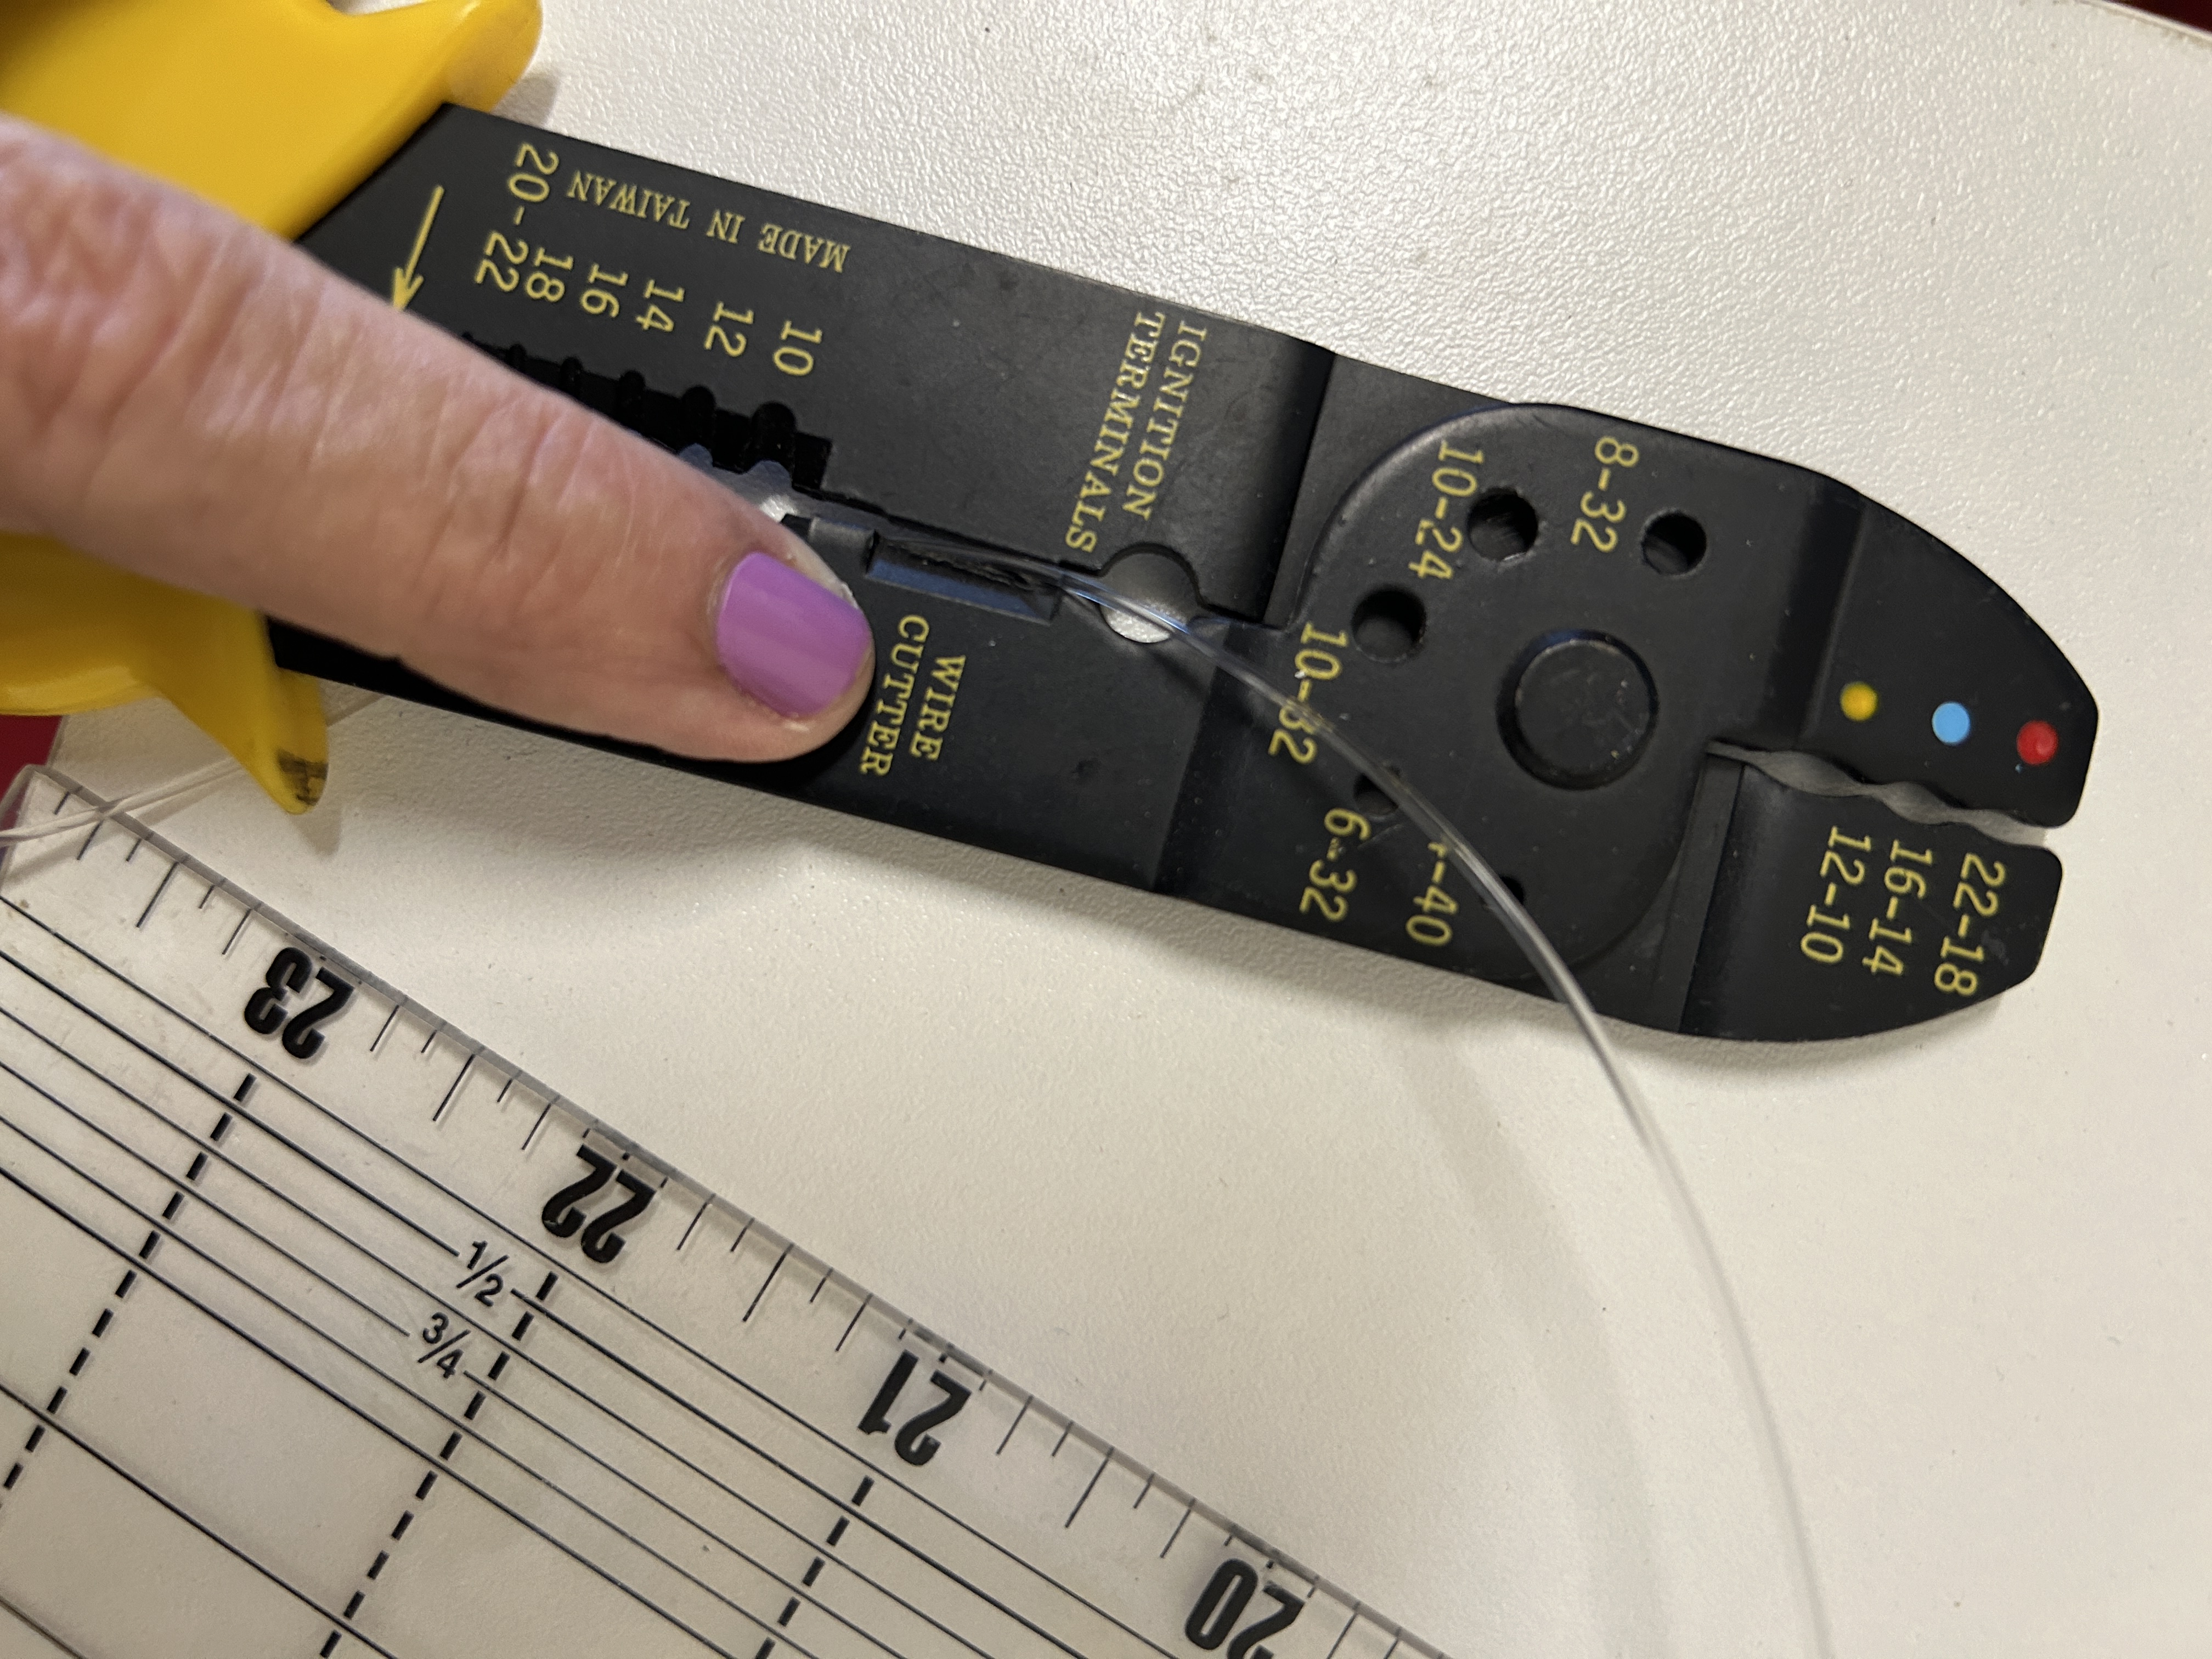
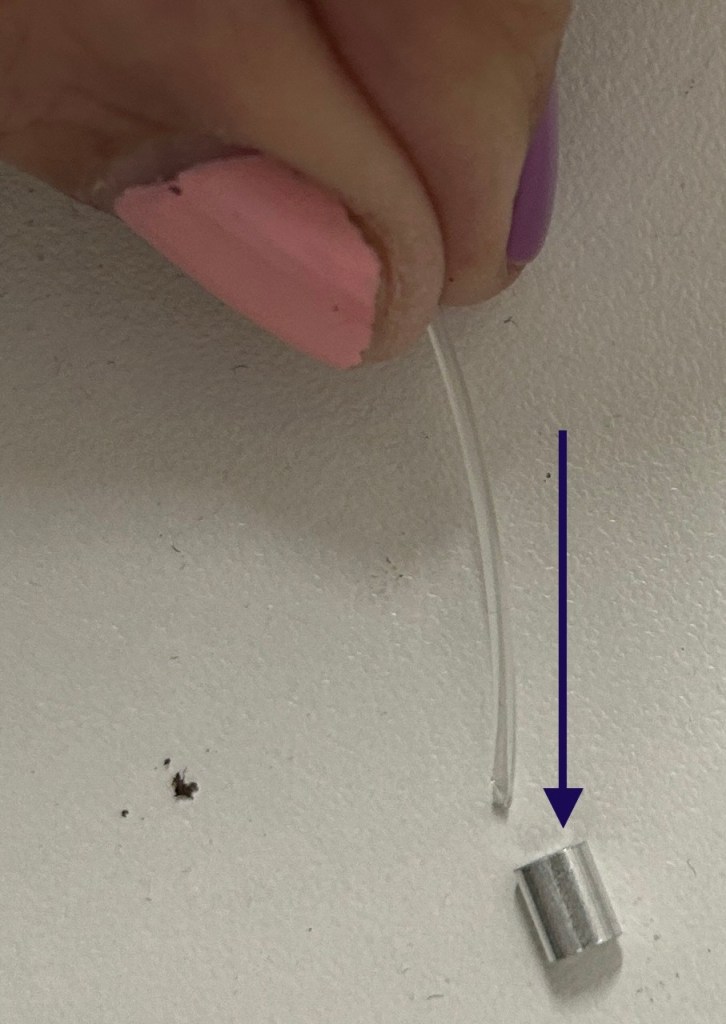
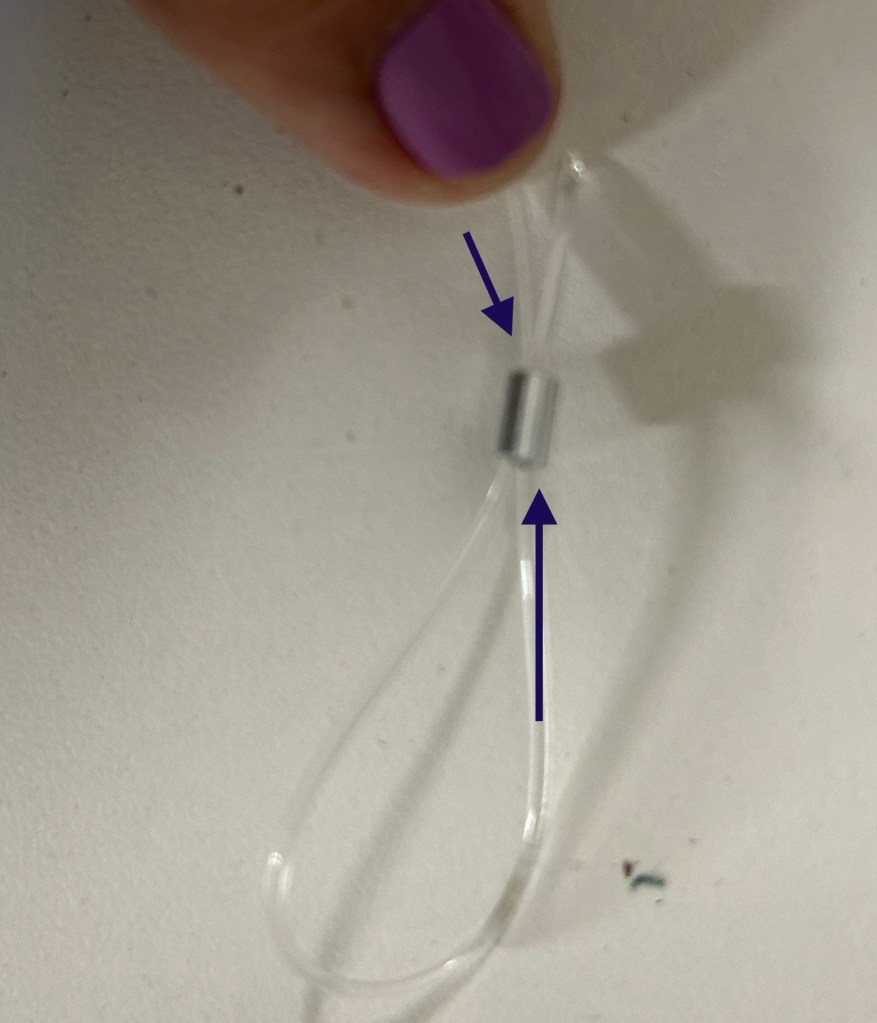
The first thing I had to do was measure how long I wanted the wires to be, then allow for a couple inches fold over to make the loop to go over the top hanging hook. I made a removable mark on my table so the wires would be close to the same length. This wire cutter and stripper is a necessary tool. It easily cuts the wire and the top crimps the ferrule (crimping sleeve) after making the loop in the wire. I think the next pictures will explain that.
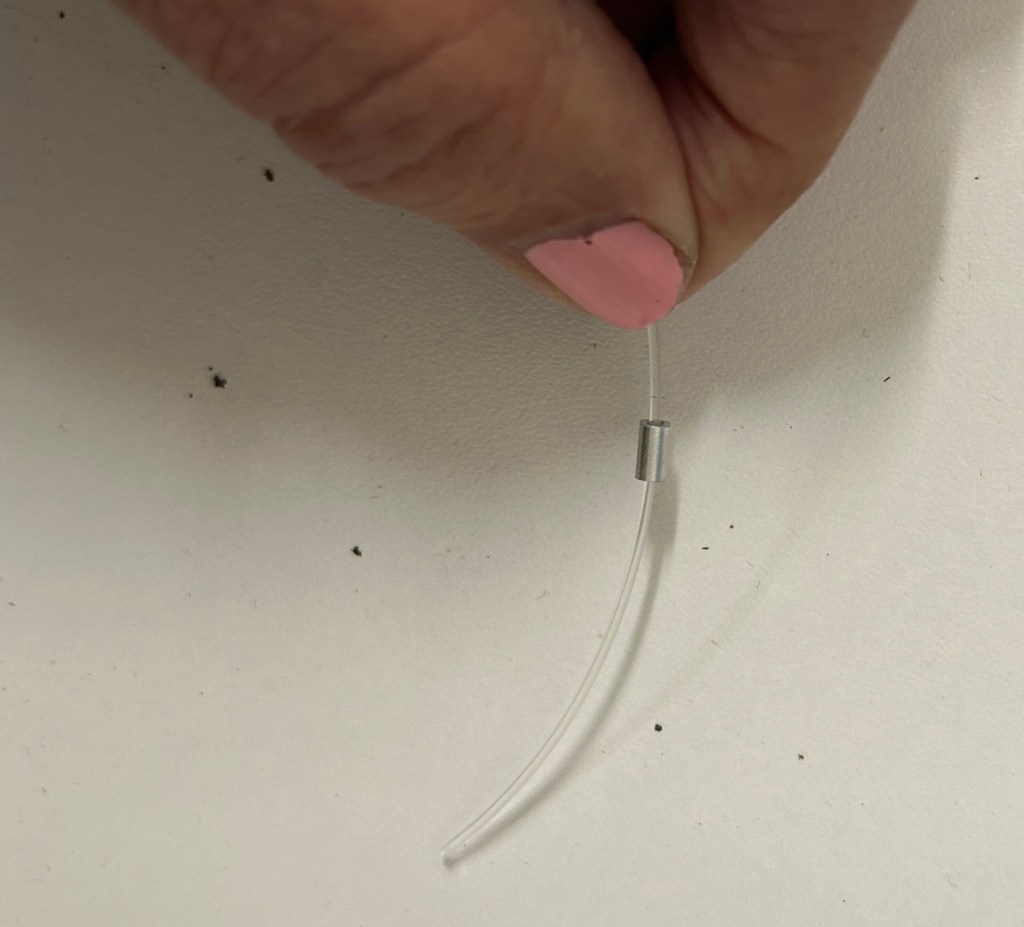
After cutting all my wires it was time to get them ready for the picture rail hanging hook. Take the wire and poke it through theferule, then double it back on itself to form a loop and putting the end back through the ferule. Make sure your loop will fit over the hanging hook. Then using your wire tool, squeeze the ferule. Pull on it to make certain it is tight.
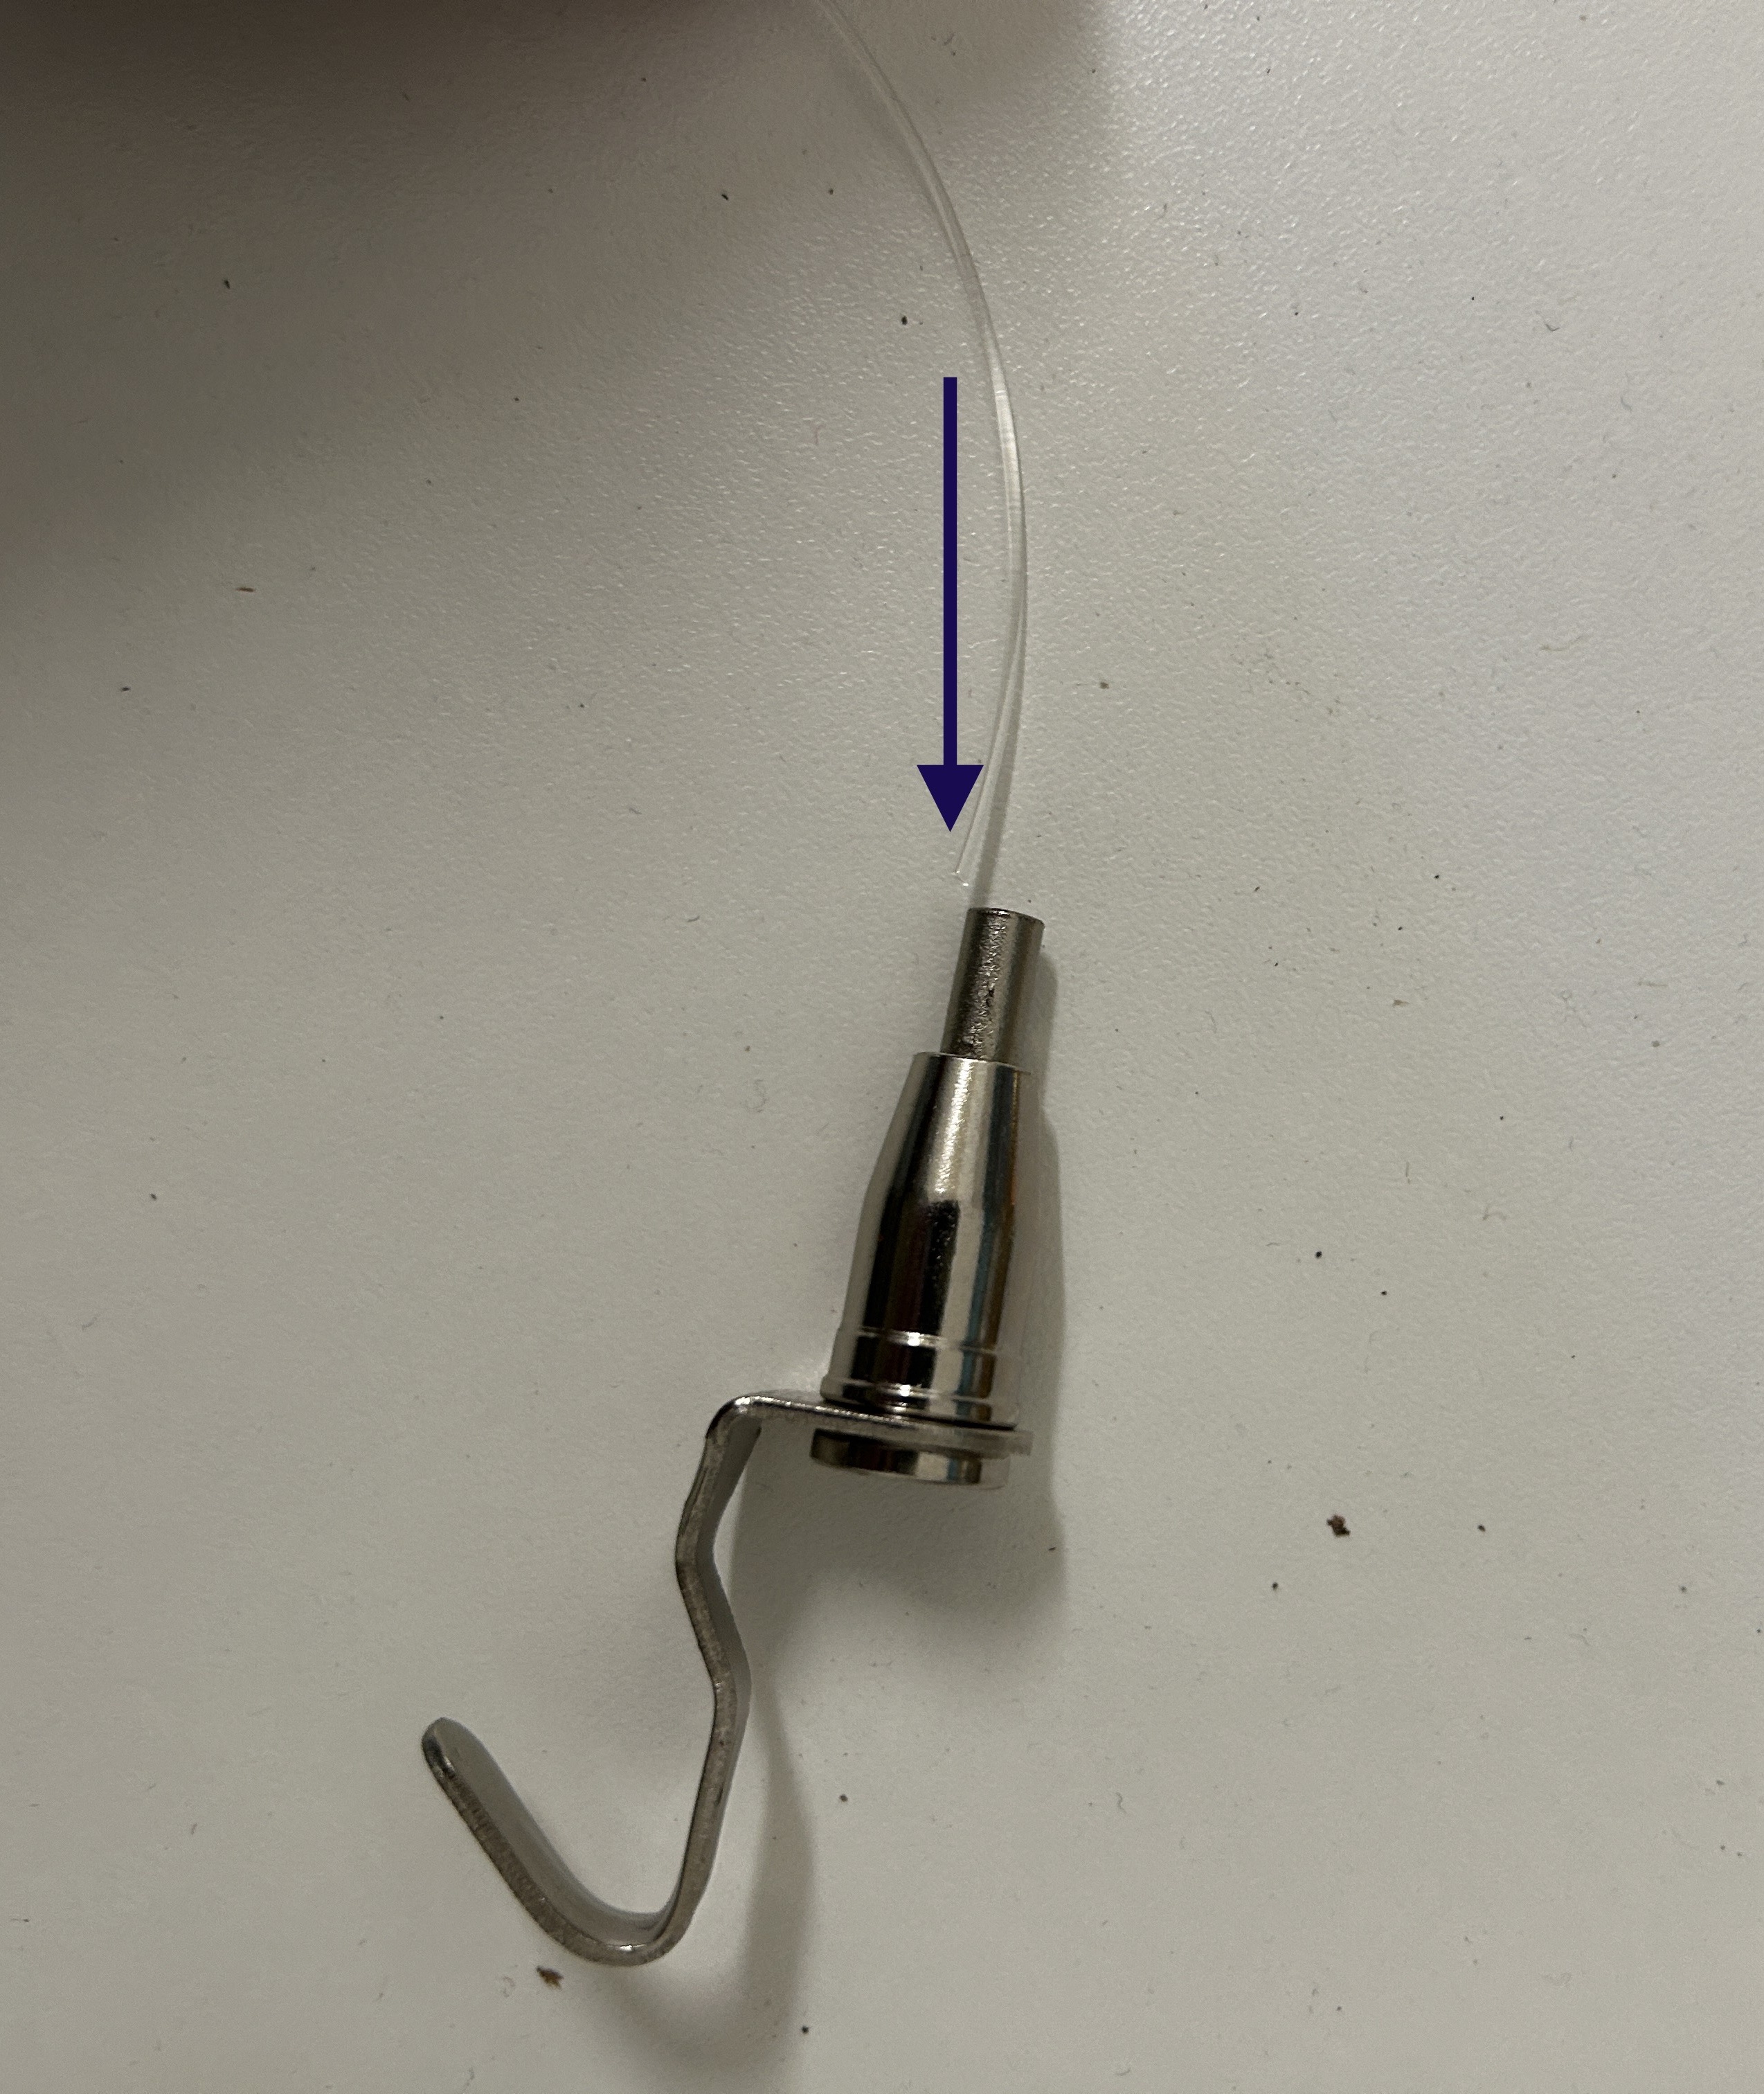
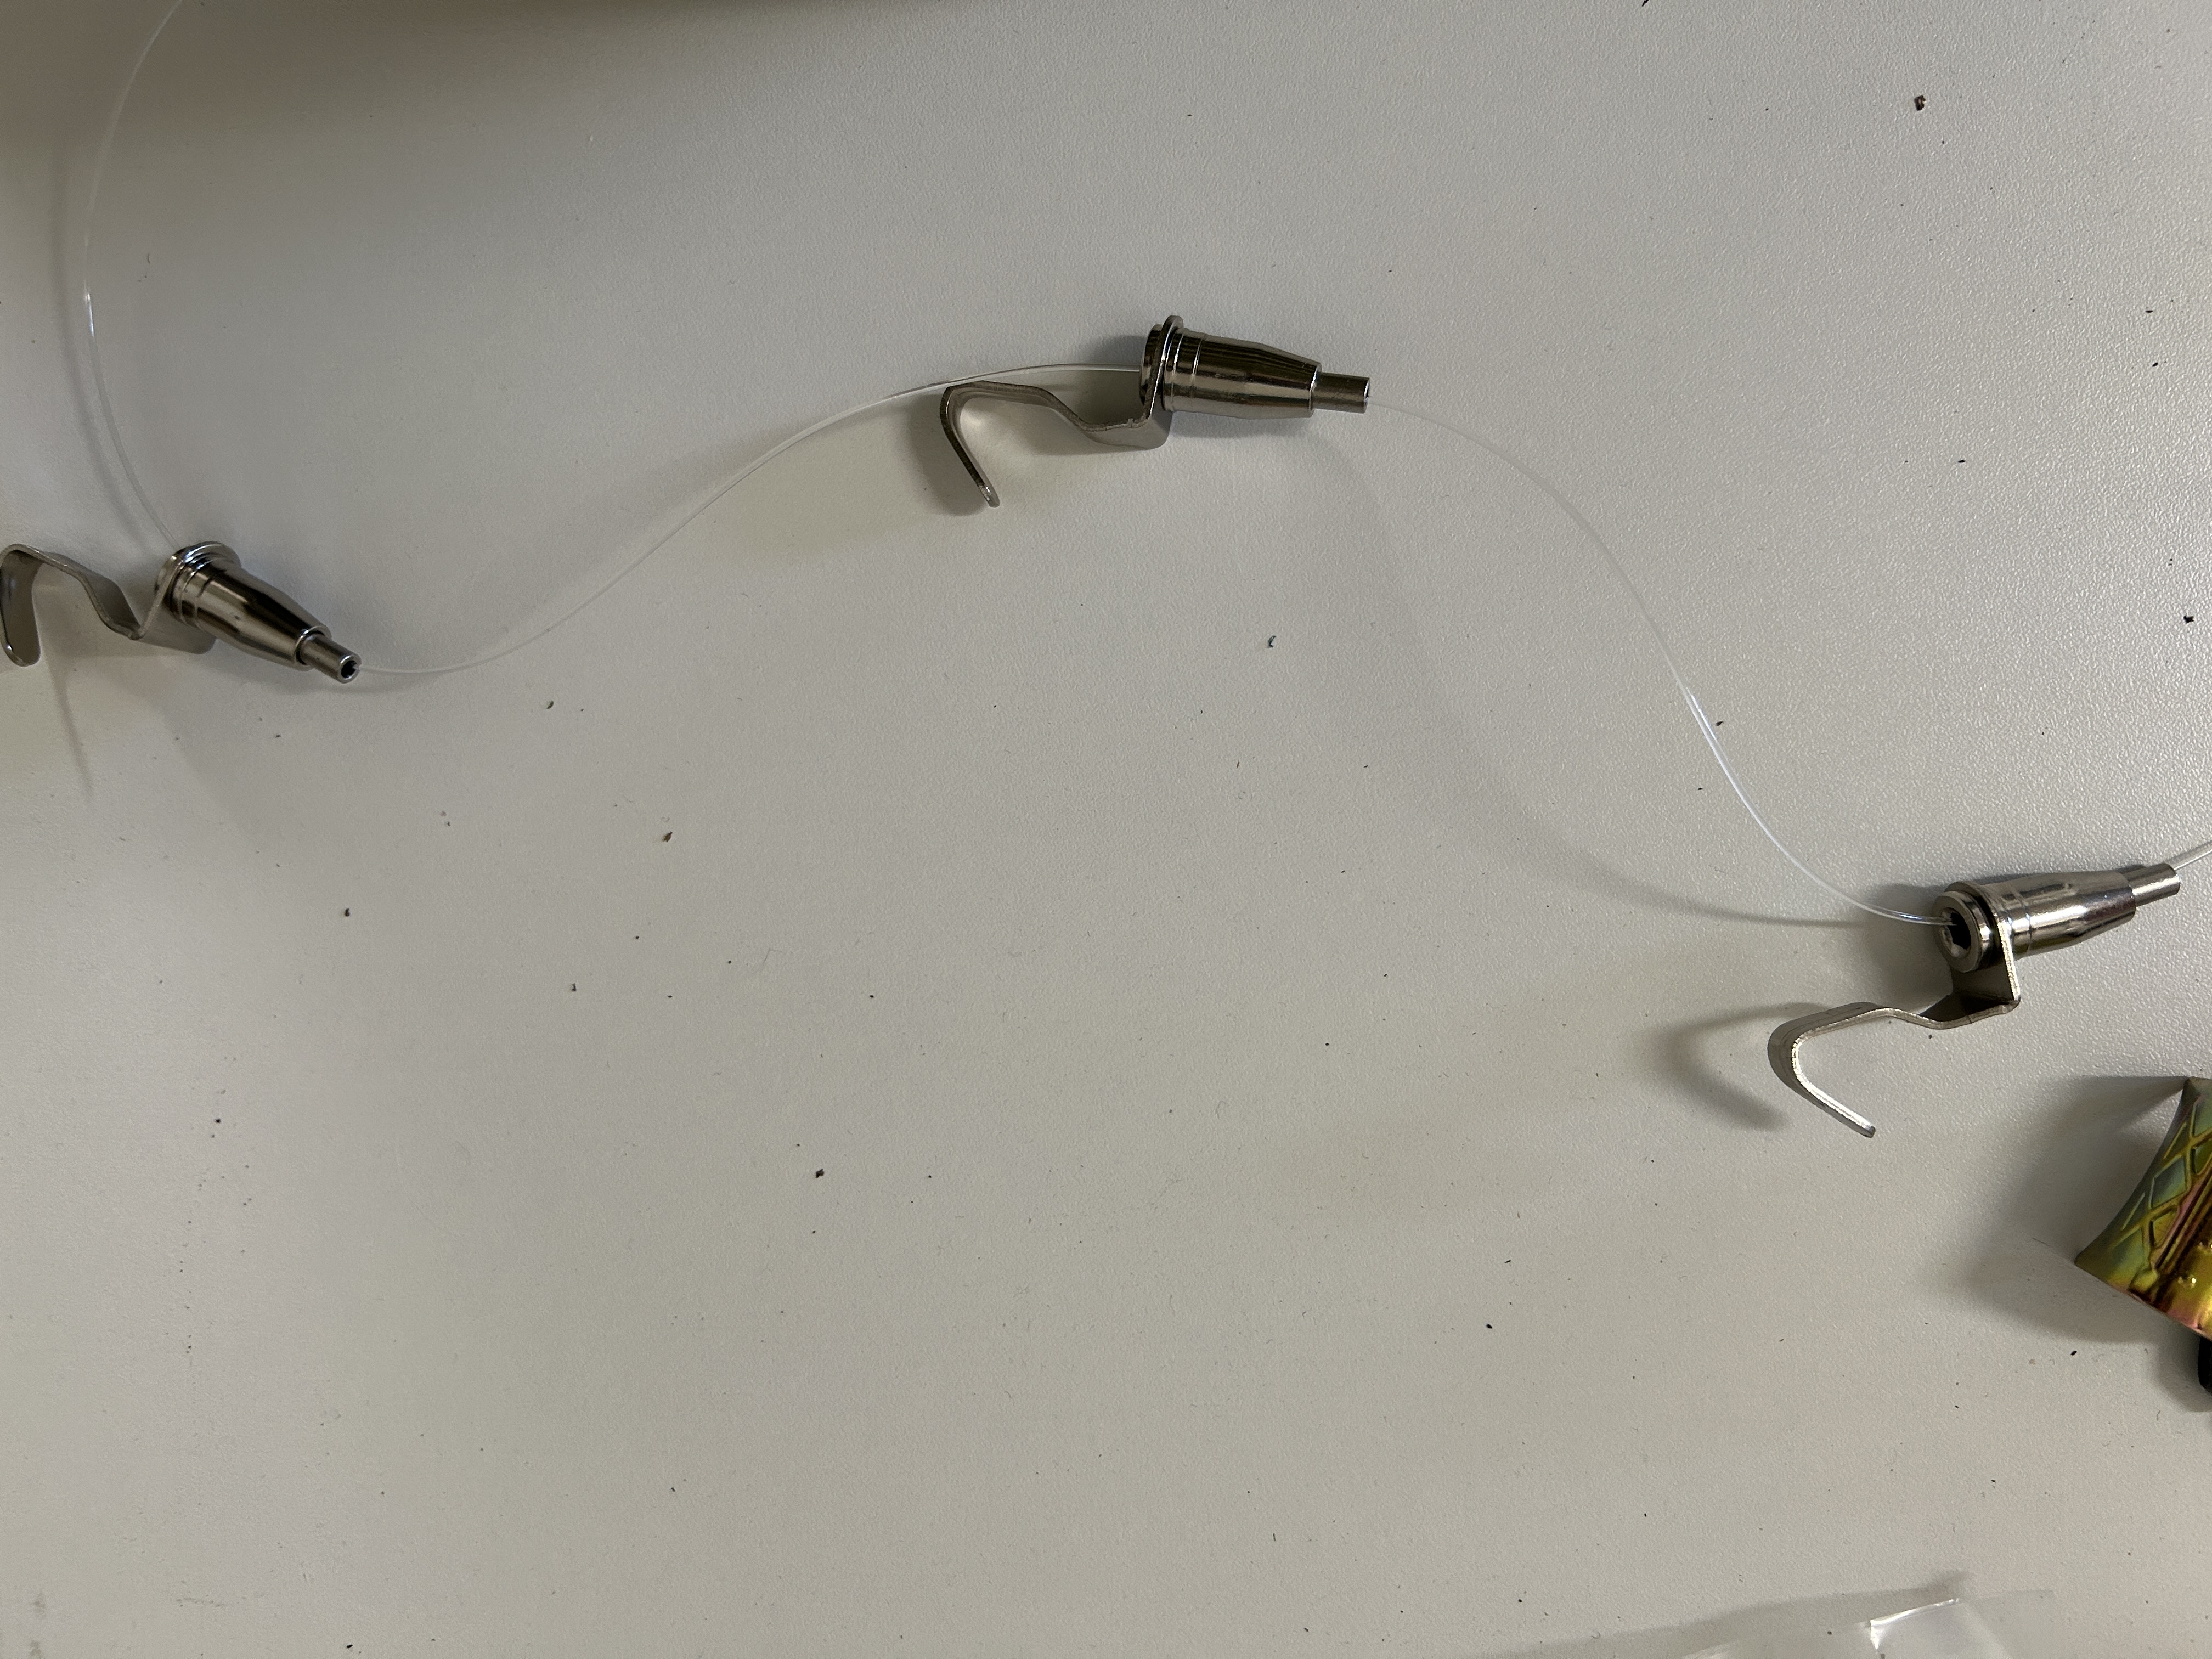
Now it is time to slide the picture hanging hooks onto your new wires. You can put as many hooks as you like on the wires. I really like that I can stack multiple pictures on my wall without making holes. Make sure that the hook holds before hanging a picture. I had one hook that the spring mechanism didn’t work. I am so happy with this system! I’ve put one wire over the door for illustration. Since my ceilings are 10 ft. I need a ladder to install all my hooks on the rail. There are other options available for the DIYer, just do some online searching. Most of the ready made kits are for small areas and they were not an option for me.